
It may look like a minor issue, but that opening between your door and floor can be a real nuisance.
If you’re dealing with drafts, dust, or pests entering through this gap, you’ll want to know how to fix the gap between the door and floor quickly and easily. So how do you go about it?
You can fix the gap between the door and the floor by using the following:
- A door sweep
- A flexible door bottom seal
- A threshold seal
- Corner seals and pads
- Vinyl weather stripping
Either of these options should take care of the problem you now have at hand. You can even combine multiple methods for an extra secure solution.
In this article, I will walk you through the process of using different methods to solve your current problem. I will show you how to do it yourself, and it’s easy – you don’t have to be a veteran in DIY to make this happen. Of course, I have more lined up, and you really won’t want to miss even a bit!
6 Simple Ways To Fix the Gap Between Your Door and Floor
Some of the easy fixes include:
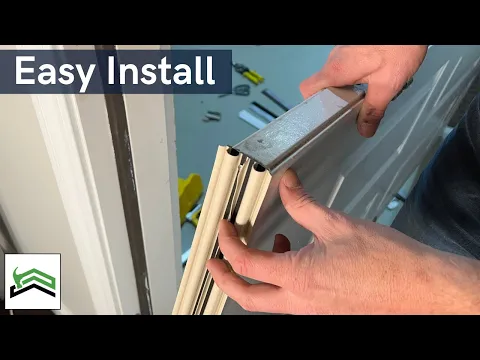
1. A Door Sweep

A door sweep is one of the basic fixes for the void between your closed door and the floor. It’s a strip of flexible material that attaches to the bottom of your door to block the opening.
Door sweeps can have bristles, rubber, or plastic. These materials form a barrier that prevents air, dust, and other elements from entering the room through the space underneath the door.
Door sweeps come in two size varieties: A 36-inch version and a larger 42-inch. So, measure the width of your door to know which size is for you.
As for the type to go for, you also have to choose between two:
- Screw-in door sweep
- Stick-on door sweep
Of the two, the screw-in door sweep is the most popular one. Usually, it features pre-drilled aluminum at the upper part and plastic rubber or bristles at the bottom.
The upper part of the seal helps you secure it to the door, while the lower part forms the barrier that keeps elements at bay.
Procedure:
- Get the width of your door using a tape measure.
- Measure and mark the door sweep according to the width of the door.
- Cut the door sweep to size using a hacksaw.
- Align the door sweep to the bottom of the door, and mark the door for drilling with the help of the pre-drilled holes on the sweep.
- Drill the requisite holes, realign the door sweep, and drive the screws.
- Cut off any excess material from the door sweep.
And that’s all for the screw-in door sweeps!
As for the counterpart versions, they come with a strong adhesive on the back. I recommend that you work with this type if you don’t have a drill or want to avoid the hassle of drilling holes.
They still work as well as the screw-in, so you aren’t settling for a “lesser” type.
Procedure:
- Measure your door’s width using a tape measure.
- Cut the door sweep according to the measurements.
- Align the door sweep to identify the ideal placement.
- Peel off the adhesive backing and stick the door sweep to the door.
- Press down firmly to ensure a secure fit.
- Wait for the adhesive to dry before using the door.
2. A Flexible Door Bottom Seal

If you don’t want to drill holes or even use an adhesive, use a flexible door bottom seal instead.
It’s a strip of a compressible material that uses either vinyl, foam, or rubber to seal off the gap between your door and the floor.
The compressible design gives it greater adaptability making it easy to fit in almost any space. And yes, it installs in no time and doesn’t require any special skills or tools.
Procedure:
- Measure and cut the strip according to the width of your door.
- Open the door halfway.
- Slip the seal into the bottom of your door so that the door’s thickness goes into the seal’s slot.
- Cut off any excess.
- Close the door and check for any gaps.
3. A Threshold Seal

A threshold seal is quite similar to a flexible door bottom seal. For instance, it uses a compressible material to form a secure seal between the door and the floor. Plus, it is as easy to install as a door bottom seal.
But then, that’s where the similarity ends!
Unlike the counterpart that attaches to the door, a threshold seal goes onto the floor. That means it’s usually sturdy and can withstand the wear and tear of foot traffic.
And when choosing one for your entry, it should help to remember that threshold seals come in several colors. As such, don’t settle for any color since you can choose the one that best suits your needs.
And as long as you pick the ideal size, a threshold seal should mark the end of your problem. Alone, the piece does an excellent job, but you can also use it with a flexible door seal for an even tighter seal.
Procedure:
- Trim the threshold seal to fit the distance between your two door frames.
- Clean the floor, and if necessary, sand it to remove any irregularities.
- If you’re using an adhesive, peel off the backing and stick it onto the floor.
- Press down firmly and hold for a while to ensure a secure fit.
- Check your work and make any necessary adjustments.
4. A Weatherstripping

Weatherstripping comes in various materials. So again, you’re at liberty with what material you want to use for your project.
But common weatherstripping materials include foam, rubber, felt, and vinyl, among others.
Unlike the threshold seal, a weatherstrip will attach to the door, not the floor.
However, your door’s bottom edge will need to have kerf cuts for the splines of the weatherstripping element to fit in. The weatherstrip should attach easily if the ridges are in good shape.
Procedure:
- Cut the weatherstripping and ensure it’s slightly longer than the width of your door.
- Insert the splines into the kerf cuts in the door, slowly tapping the weatherstrip until you’ve driven it through the entire door width.
- Secure it with nails if necessary.
- Trim the extra length.
Note that you may need to make ridges on your door if it doesn’t have any. That may mean more work, especially since you must remove the door first. But as long as you have the necessary tools, then the rest is easy.
Here’s a video showing how to insert weatherstripping:
5. Corner Seals

If the gap size isn’t equal across the door, or the opening is near the door frame instead of the floor, use a corner seal to cover the gap.
Corner seals come in multiple packs, so you can easily fit them in a corner, near the door frame, or even on the door. And they don’t require any special tools or skills to install.
One thing, though – this seal type uses a strong adhesive, so ensure the first placement is accurate.
You can line up several corner seals if the gap is wider or stack several layers if the first layer doesn’t fit tightly.
Procedure:
- Clean the threshold to remove any dirt or debris from the gap.
- Remove the adhesive backing and stick the corner seal onto the threshold.
- Press down firmly to ensure a secure fit.
- Stick more seals if you need more coverage.
- Stack several layers if the first layer doesn’t fit tightly.
6. A New Threshold

If your threshold is old and worn out, consider replacing it instead. Of course, you could still use either of the options above. But then, a new threshold will provide a more long-lasting solution.
Plus, a new threshold will complement the look of your door better. Actually, with the perfect color, a door threshold will look like part of the original design.
But then, the upfront cost of installing a new threshold is higher than using either of the first options. But in the long run, it’s more economical since you’ll still need to repair the threshold eventually.
For DIYers who haven’t installed a threshold before, there is no need to worry! Here you don’t need any special skills to get it right.
Procedure:
- Remove the old threshold.
- Measure the size of the old piece if it’s still intact.
- Cut a new piece of the same size or slightly larger.
- Secure it in place with screws.
- Check for any gaps and make necessary adjustments.
Importance of Fixing the Gap Between the Door Floor
Here are some of the benefits of fixing the door gap:
1. It Prevents Cold Drafts

Since cold air is denser than warm air, it’s more likely to enter your house through the spaces under the door than any other.
And when that happens, it forces the HVAC system to work harder to maintain the temperature you want, which increases your energy bills.
But once you seal off the gap, you block that cold air from entering your home. That helps keep it warm during winter and cool during the blazing summer.
2. It Reduces Noise Pollution

Noise pollution is a real nuisance, especially in densely populated neighborhoods. It finds its way into our homes through several openings, including door and window gaps.
But by sealing off the gap between your door and floor, you’ll reduce the amount of noise that enters your home.
In addition, the seal keeps conversations from escaping outside of your house. Well, that’s better if you have kids who like screaming at the top of their lungs.
3. It Keeps Bugs at the Bay

Door gaps are one of the main entry points for bugs into your house. And you probably know it takes work to get rid of them completely once they’re in.
So, the best thing you can do is seal door gaps properly. Doing so will protect your home from any unwanted pest invasion. It also means you won’t have to spend money on pest control.
4. Maintenance Is Now Easier

The opening between the door and the floor can be a nightmare if you are trying to keep your surface clean. The sand, dirt, and grit particles can enter through the gap, making maintaining your floor squeaky clean difficult.
Filling the gap between the door and floor prevents these particles from finding their way into your home. That, in turn, minimizes the time you have to spend cleaning the floor.
5. Protects Your Floor

The sand and grit particles that enter through the floor clearance can easily scratch against the surface of your floor. That’s especially true if you have delicate surfaces that show scratches easily, for instance, vinyl flooring or wood.
But by sealing the gap, you’ll have protected your floor and scratches. That way, you keep your floors looking new and attractive for a long time.
Note that you may need to make ridges on your door if it doesn’t have any. That may mean more work, especially since you must remove the door first. But as long as you have the necessary tools, then the rest is easy.
You Don’t Need a Gap Between Your Exterior Door and Floor

Usually, when installing any door or sealing the space between the door and floor, you want to ensure that you leave the recommended space. That makes it easier to open and close the door without any difficulty.
But it’s best not to leave a gap between the door and the floor for exterior doors. Yes, even with the advantages of leaving some space, the disadvantages of doing that when installing an exterior door are more.
The outer door is the first line of defense against invasion by bugs or humans. It’s also the main protection against cold air during winter and hot air in summer. And that’s why it’s essential to seal the gap completely when installing an exterior door.
Complete sealing may mean using more force to open and close the door, but that’s a small price to pay for the added safety.
Standard Gap Between Interior Doors and Floors

Leave a 2-inch gap between the door and the floor when installing an interior door. But that’s for an unfinished floor. A much smaller opening, preferably 1/2 to 3/4 of an inch, is ideal for a finished surface.
If you must operate outside that range, err on the smaller side. That’s because it’s much easier to widen a gap than reduce it.
But if it’s possible to stick to the recommended range when installing an interior door, it will make your life much easier. You’ll find opening and closing the door a much smoother experience.
Plus, leaving some gaps will improve the efficiency of your home’s HVAC system, as the opening serves as the return air pathway.
Conclusion
Filling the space between the door and the floor is essential for many reasons. It improves your home’s energy efficiency, makes it easier to maintain the floor, and prevents bug invasion.
And so if you want to enjoy all these benefits, it’s best to fill the gap between your door and floor.
It’s also important to note the recommended gap size when installing an interior door. When you adhere to this, you’ll find it much easier to open and close the doors.
And you’ll also keep your home more secure from any unwanted visitors.
Frequently Asked Questions
What Is the Gap Between Door and Floor Called?
The gap between the door and the floor is called floor clearance. It’s also known as bottom clearance, and it’s different from stile clearance which is the side gap.
Exterior doors don’t need floor clearance, unlike interior ones, where you have to leave a 1/2 to the 3/4-inch gap.
Why Is There a Gap at the Bottom of the Doors?
- The gap at the door’s bottom helps with air circulation.
- It allows you to open and close doors without difficulty, especially if you have a larger door.
- It helps to protect your floor from getting scratched.
Should a Door Sweep Touch the Floor?
Yes, a door sweep should touch the floor. This will ensure that the gap between the door and floor is filled, thus preventing any air or pest infiltration.
It also helps to keep the temperature inside your home more consistent.


