Do you want to add a living roof to your home? Are you daydreaming about spending evenings on your roof grass while gazing at the stars? In either case, you may require the assistance of a guide to help you grow a roof garden.
Growing grass on your roof requires hard work, patience, and a proper setup. But if you follow a practical guide, the entire process can be fun and fruitful.
In this post, we have divided the process into six simple steps.
So, without any further ado, let’s start exploring a comprehensive way of growing roof grass.
Roof grass is not only a lovely addition to your home but also good for the environment and cools your home. Growing roof grass consists of the following six steps:
- Evaluate the load capacity of your roof. It should be capable of holding the weight of wet soil.
- Take a permit to grow grass on your roof from the concerned authority.
- Install sources for watering the plants and managing excessive moisture.
- Get yourself a lightweight soil engineered for a grass roof.
- Choose suitable grass and plants for your roof: select heat and drought-resistant plants.
- Grow your roof grass and maintain it for healthy growth.
A Step-by-Step Guide To Grow Grass on Your Roof

Growing roof grass can be a fun activity if you have a comprehensive yet easy guide. To help you out, we have divided the process into six easy steps.
Follow our guide to give your roof a natural green look.
Step #1: Evaluate Your Roof Load
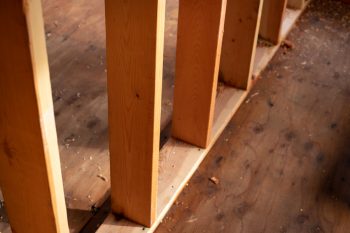
The first step to planting grass on your roof is checking its load capacity. The roof area should be strong enough to hold a load of soil when it is wet.
Planting can put it at risk of collapsing if you have a weak roof that cannot support heavy weights.
Also, if your area receives snowfall, you need to consider the weight of the snow on the soil during the winter season. It is recommended that you hire a structural engineer to assess the load capacity of your roof.
Step #2: Take a Permit if Required
Before you start planting, check your local building codes to ensure there are no restrictions on growing roof grass.
There are certain areas where the building owners and homeowner associations restrict growing roof plants due to height, weight, and other reasons.
Therefore, it is recommended to investigate all the terms and conditions and obtain a building permit before preparing your plot.
Step #3: Manage Roof Water Sources
Make a plan to install the necessary sources to water your grass regularly. This might entail installing sprinklers or a small irrigation system, which are beneficial for lightening the load on the roof.
Moreover, focus on the drainage system on your roof. A proper sewage system is essential for the following reasons:
- Protects the roof from any damage.
- Removes extra water and stops it from pooling.
- Retains an adequate amount of water in the soil.
- Protects the roof from getting mold due to moisture.
Consider sloping your roof 10 to 30 degrees to prevent water from pooling in one spot. Other factors include the installation of root barriers and filter fabric to avoid clogging the drainage system.
Step #4: Engineer Lightweight Soil
Get yourself a lightweight soil that is engineered for roof plantations. This soil type differs from the regular topsoil used in lawns and gardens. Compared to the topsoil, roof soil is lighter in weight and has fewer rocks, perlite, and vermiculite.
Once you have the potting soil, it is suggested that you test it first in a box or pot to ensure its fertility. Add fertilizer or compost if the soil is weak, and then spread it evenly on your growing medium.
Step #5: Choose Suitable Plants
Grass is the most resilient plant on the planet. It can survive in all weather conditions. You can grow Doob grass or American lawn grass on your roof, as they can thrive anywhere you plant them and resist conditions like drought, frost, heat, and wind.
However, if you want to grow a roof lawn with various plants, choose low-maintenance plants that have shallow roots, can withstand heat, and have minimum watering needs.
Step #6: Grow Your Grass and Maintain It
After establishing a growing medium and a suitable boundary to contain the potting soil, you are all set to grow grass on your roof. You can either use plants or seeds to grow plants on your roof garden.
However, purchasing plants and planting them is a simple, quick, and pocket-friendly way to grow grass on a roof.
Get the grass sheets from a nursery and plant them in horizontal and vertical lines into the soil bed. The ideal height of the grass to achieve is 1 inch from the ground. Maintaining the plants helps them grow well and prevents weeds and moss from growing.
Factors To Consider for Growing Roof Grass

1. Type of Green Roof
There are two major types of roofs, i.e., intensive and extensive roofs. Intensive roofs require high maintenance, regular irrigation, and fertilizers. Extensive roofs are comparatively low maintenance and grow naturally.
So before the plantation process, decide which type of green roof you want.
2. Installation of Root Barrier
It is advised to install a root barrier below your soil bed to prevent the roots from reaching the structure, as the roots of your plants can harm the roof’s structure and cause cracks in it.
3. Placement of Your Roof Grass
Choose the location of the grass on the roof carefully. Observe where there is enough sunlight and air, and then grow your plants on that spot.
Final Word
Growing roof grass improves your home’s appearance while minimizing its cooling and heating effects. Moreover, grass and plants are also beneficial for the environment. So growing grass on your rooftop is a win-win situation for you.
We sincerely hope that our blog helped you in the process of growing roof grass.


